Create a simple Photoblog with Ruby on Rails - Part 3
After we have added authentication to our application, lets add something that is worth to protect. In this Chapter we are going to add our main functionality, namely uploading and browsing images.
Carrierwave to the resque
As you guessed right, also for this task you don’t have to reinvent the wheel. There are different gems that handle file uploading very well, but in this case we go for Carrierwave. Even if paperclip is used more often, Carrierwave has a lot more to offer. If you’d like to read more about these two (and others) in comparison, just ask google. You can find other file upload gems in the Ruby Toolbox which is by the way a very good starting point if you are looking for gems to a specific topic.
Ryan Bates also covers carrierwave in a video tutorial (http://railscasts.com/episodes/253-carrierwave-file-uploads)
The Photo model
Our first step is to create a model that holds the infomation about our photo we are going to upload. So lets create that. We want to give that a name, and a description. After that, migrate the database.
rails g model PhotoPost name:string description:text photo:string user:references
rails db:migrate
Again, this is going to create a migration, and also the model class. If we open the newly created file app/model/photo_post.rb we can see that it’s
nearly empty, except for the line belongs_to :user. Never the less, it’s all we need for now, the attributes are retrieved from the mapping in db/schema.rb.
The user reference
The part user:references automatically created a relationship between our PhotoPost and the User. When we create a Photo we can assign a user to
that relation and it’s id will be stored to the photo_posts.user_id column. This automatism works because rails depends heavily on naming conventions. So
with the relationship named :user it expects a model called User to exist.
As you can see, I also added an attribute photo of type string. This is where the location path to the uploaded file gets stored.
Adding Carrierwave
Add the dependency to the gemfile and run its generator:
Gemfile
gem 'carrierwave', '~> 1.0'
gem 'mini_magick' # requires imagemagick libraries to be installed on your system
and then run bundle install. Now we are basically just following the “Getting Started” instructions of Carrierwave. We first create a new Uploader called
PhotoUploader. This is where the configuration happens. The mini magick gem is required to do resizing of the images.
rails generate uploader Photo
This gives us a new folder in the app directory named uploaders. You can see, the folder structure is not completely fixed, feel free to add new ones if the classes do not fit into an existing one. Let’s change to configuration to something like this:
app/uploaders/photo_uploader.rb
class PhotoUploader < CarrierWave::Uploader::Base

  include CarrierWave::MiniMagick

  # Choose what kind of storage to use for this uploader:
  storage :file
  # storage :fog

  # Override the directory where uploaded files will be stored.
  # This is a sensible default for uploaders that are meant to be mounted:
  def store_dir
    "uploads/#{model.class.to_s.underscore}/#{mounted_as}/#{model.id}"
  end

  # Process files as they are uploaded:
  # Resize the photo to max width and height
  process resize_to_fit: [1920, 1080]

  # Create different versions of your uploaded files:
  version :thumb do
    # resize this version to fill a box of width x height
    process resize_to_fill: [500, 300]
  end

  # Add a white list of extensions which are allowed to be uploaded.
  # For images you might use something like this:
  def extension_whitelist
    %w(jpg jpeg gif png)
  end

end
This will do some processing on the file, so that the stored files will be no larger than 1920px * 1080px and also creates a smaller version for thumbnail display.
For now we just store the files on local file storage. If we want to deploy to heroku, we need to change that to a cloud storage, as heroku does not provide any diskspace.
Be aware that this requires to have imagemagick installed on your computer.
Add the uploader to our model
In order to let our model handle files, the only thing we need to do is mounting the uploader:
app/models/photo_post.rb
class PhotoPost < ApplicationRecord
  belongs_to :user
  mount_uploader :photo, PhotoUploader
end
The class method mount_uploader ensures that we have an instance of the PhotoUploader on our photo attribute. It will process any file
we set on the :photo attribute and stores it’s relative path to the database. Additionally it gives us some useful methods on the
PhotoPost instance to access the file and the variations we created with version :thumb:
# lets create a first photo post
PhotoPost.create(photo: File.open('path/to/the/photo.jpg), name: "Test", description: "Our first photo")

photo_post = PhotoPost.first
photo_post.photo_url
#=> "http://localhost:3000/uploads/photo_posts/1/photo/1/photo.jpg

# To get the generated thumnail version:
photo_post.photo_url(:thumb)
#=> "http://localhost:3000/uploads/photo_posts/1/photo/1/thumb_photo.jpg
Create a File upload form
First we bootstrap a controller with all the crud actions we need.
rails g controller PhotoPosts new show create index
The routes it created for us are not what we wanted. So lets fix those. We replace the get 'photo_posts' etc. with a method called resources
config/routes.rb
Rails.application.routes.draw do
  resources :photo_posts

  devise_for :users
  get 'home/index'

  # For details on the DSL available within this file, see http://guides.rubyonrails.org/routing.html

  root to: 'home#index'
end
This will create resourceful (REST style) routes for all the crud actions with our PhotoPosts.
To make it easier creating forms with bootstrap styling we add an other gem:
Gemfile
gem 'bootstrap_form'This gives view helpers that generate the html syntax for forms that match the bootstrap requirements.
Now lets setup an empty photo_post variable in the new action, that we can use to build the form:
app/controllers/photo_posts_controller.rb
  def new
    @photo_post = PhotoPost.new
  end
The @-Sign makes the variable an instance variable and that makes them available in the rendered view. So we can now add a form to our view:
app/views/photo_posts/new.html.erb
<h1>Upload Photo</h1>
<%= bootstrap_form_for @photo_post, layout: :horizontal do |f| %>
    <%= f.alert_message 'Please fix the errors below.' %>
    <%= f.file_field :photo %>
    <%= f.text_field :name %>
    <%= f.text_area :description %>
    <%= f.submit 'Upload' %>
<% end %>
The bootstrap_form_for method will create a form tag with the correct route for our model. We can pass a block to
render the fields inside the form. bootstrap_form automatically creates the required html for the input tags and
gives names and ids for the attributes of the model.
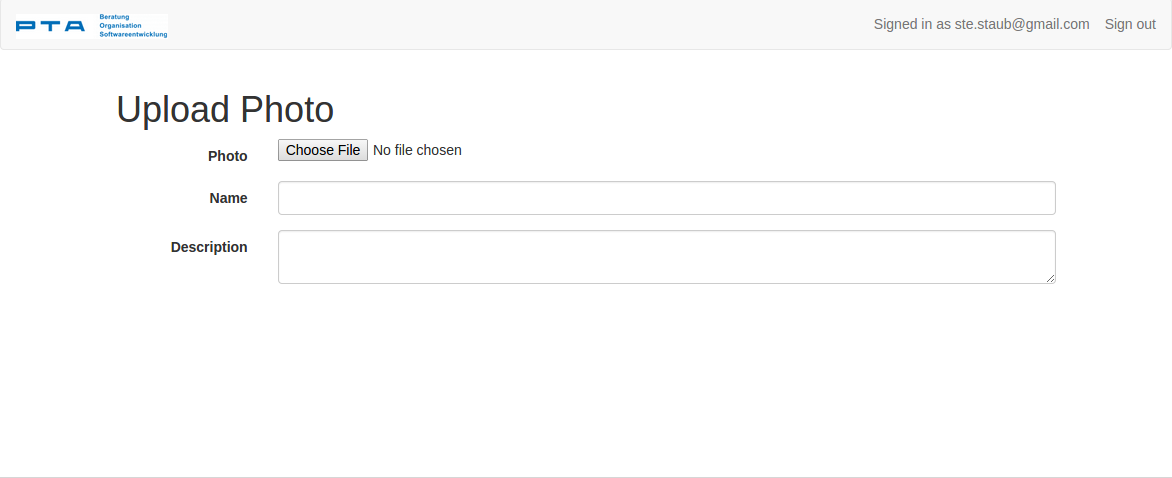
If we now restart the server and navigate to (http://localhost:3000/photo_posts/new) we can see a beautiful form:

To make sure the Photo we create gets actually saved, we now implement the create action. Our controller should now look like this.
app/controllers/photo_posts_controller.rb
  class PhotoPostsController < ApplicationController
    def new
      @photo_post = PhotoPost.new
    end

    def create
      @photo_post = PhotoPost.new(photo_post_params)
      if @photo_post.save
        redirect_to photo_post_path @photo_post
      else
        render :new
      end
    end

    def index
    end

    def show
    end

    private
    def photo_post_params
      params.require(:photo_post).permit(:photo, :name, :description)
    end
  end
All the fields provided in the form can be accessed to the params method. Rails uses Strong Parameters, which means whe
have to explicitly allow each attribute to be passed to the model. This is for security reasons as we can not assume that
the parameters passed to an action are all save. (A user could for example pass a :created_at field to the post request, or worse)
You can find out more about Strong Parameters here: http://edgeguides.rubyonrails.org/action_controller_overview.html#strong-parameters
If we go back to the form and try to upload a photo, it fails with the message, “User must exist”. That is because we do not assign
a user to the mode. We can do that by adding the current_user, which is an other devise helper. to the photo_post.
This method is provided by devise and just returns the user that is currently signed in.
app/controllers/photo_posts_controller.rb
  def create
    @photo_post = PhotoPost.new(photo_post_params)
    @photo_post.user = current_user
    if @photo_post.save
      redirect_to photo_posts_path
    else
      render :new
    end
  end
Securing the controller
But we can not be sure that the current user is signed in yet. And we don’t want to allow anonymous users to access this page anyway. So lets force authentication for this controller by just adding a before filter:
  class PhotoPostsController < ApplicationController
    before_action :authenticate_user!

    #...
  end
Now the controller is secured and a user is automatically redirected to sign in when he tries to access one of the routes. An other nice helper provided by devise.
List Photos
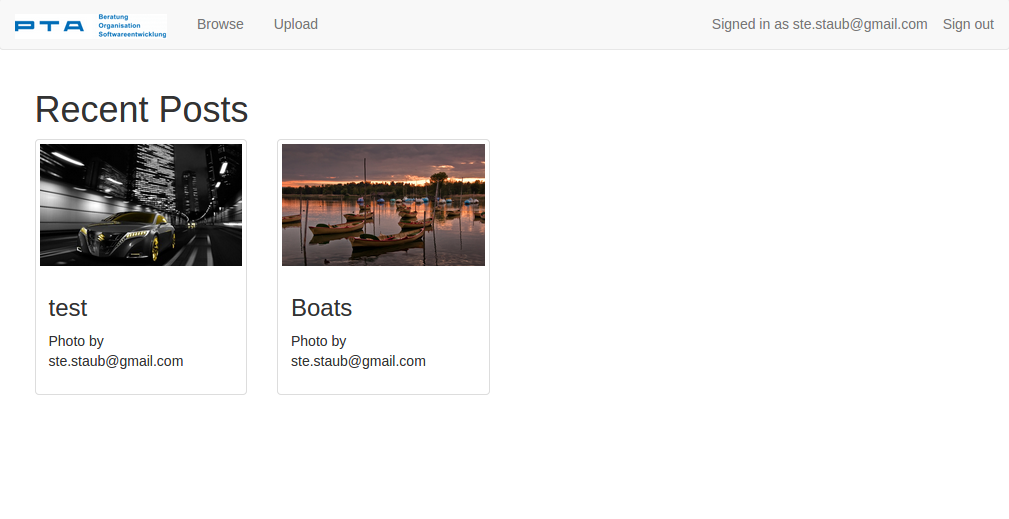
Now when we can upload new Photos, somewhere we would like to list them. This is usually done in the index action. Its pretty simple:
app/controllers/photo_posts_controller.rb
  def index
    @photo_posts = PhotoPost.all
  end
And our view would look like this:
app/views/photo_posts/index.html.erb
<h1>Recent Posts</h1>
<div class="row">
  <% @photo_posts.each do |post| %>
      <div class="col-sm-4 col-md-3">
        <div class="thumbnail">
          <%= image_tag post.photo_url(:thumb) %>
          <div class="caption">
            <h3><%= post.name %></h3>
            <p>Photo by <%= post.user.email %></p>
          </div>
        </div>
      </div>
  <% end %>
</div>
In this snipped, we get an “Array” (its actually an ActiveRecord::Relation object) over which we can iterate.
Now we can already upload photos and list them.
The only think missing, is the show action, and add some links to get to the upload form. For the show action we gonna load the post by the id that is given in the params as a route parameter:
app/controllers/photo_posts_controller.rb
  def show
    @photo_post = PhotoPost.find params[:id]
  end
app/views/photo_posts/show.html.erb
<h1><%= @photo_post.name %></h1>
<%= image_tag @photo_post.photo_url, class: 'img-responsive' %>
<div class="well">
  <p><%= @photo_post.description %></p>
</div>
And finally add the links
app/views/photo_posts/index.html.erb
<h1>Recent Posts</h1>
<div class="row">
  <% @photo_posts.each do |post| %>
      <div class="col-sm-4 col-md-3">
        <%= link_to post, class: 'thumbnail' do %>
          <%= image_tag post.photo_url(:thumb) %>
          <div class="caption">
            <h3><%= post.name %></h3>
            <p>Photo by <%= post.user.email %></p>
          </div>
        <% end %>
      </div>
  <% end %>
</div>
app/views/layout/application.html.erb
...
<% if user_signed_in? %>
    <ul class="nav navbar-nav">
      <li><%= link_to 'Browse', photo_posts_path %></li>
      <li><%= link_to 'Upload', new_photo_post_path %></li>
    </ul>
    <ul class="nav navbar-nav navbar-right">
      <li><%= link_to 'Sign out', destroy_user_session_path, method: :delete %></li>
    </ul>
    <p class="navbar-text navbar-right">Signed in as <%= current_user.email %></p>
<% else %>
...
Well, that’s it. commit the changes, then we’re gonna deploy our first rails app.
git add .
git commit -am "Added photo upload and browsing"
Make it available for the public
We could now just push our changes to heroku as we did before, but that won’t work. As described before, heroku does not provide any persistent file storage so we need to switch to an other solution, rather than storing the files in the public folder.
As often, we are not the only ones with that problem, so very likely there is a gem that will help us. Indeed there is an extension for carrierwave that supports exactly what we need, carrierwave fog.
https://github.com/carrierwaveuploader/carrierwave#using-amazon-s3
(to be continued)